
Mounds Bars /or Bounty Bars, depending on where you’re from…

ANOTHER super sized chocolate dessert recipe within a week…sorry! No, not sorry actually.
I bought a vegan mounds style bar today (it was on sale, lol) and it immediately resurrected memories of Halloween and Easter. Those sickly sweet, coconut-y chewy chocolate covered delicious little pieces of happiness…I digress.
I guess these are somewhat healthier than the store bought ones, but you have to remember that just because something is plant based, gluten free, blah blah blah, etc…doesn’t mean it’s inherently better for you. I have to remind myself of that sometimes.
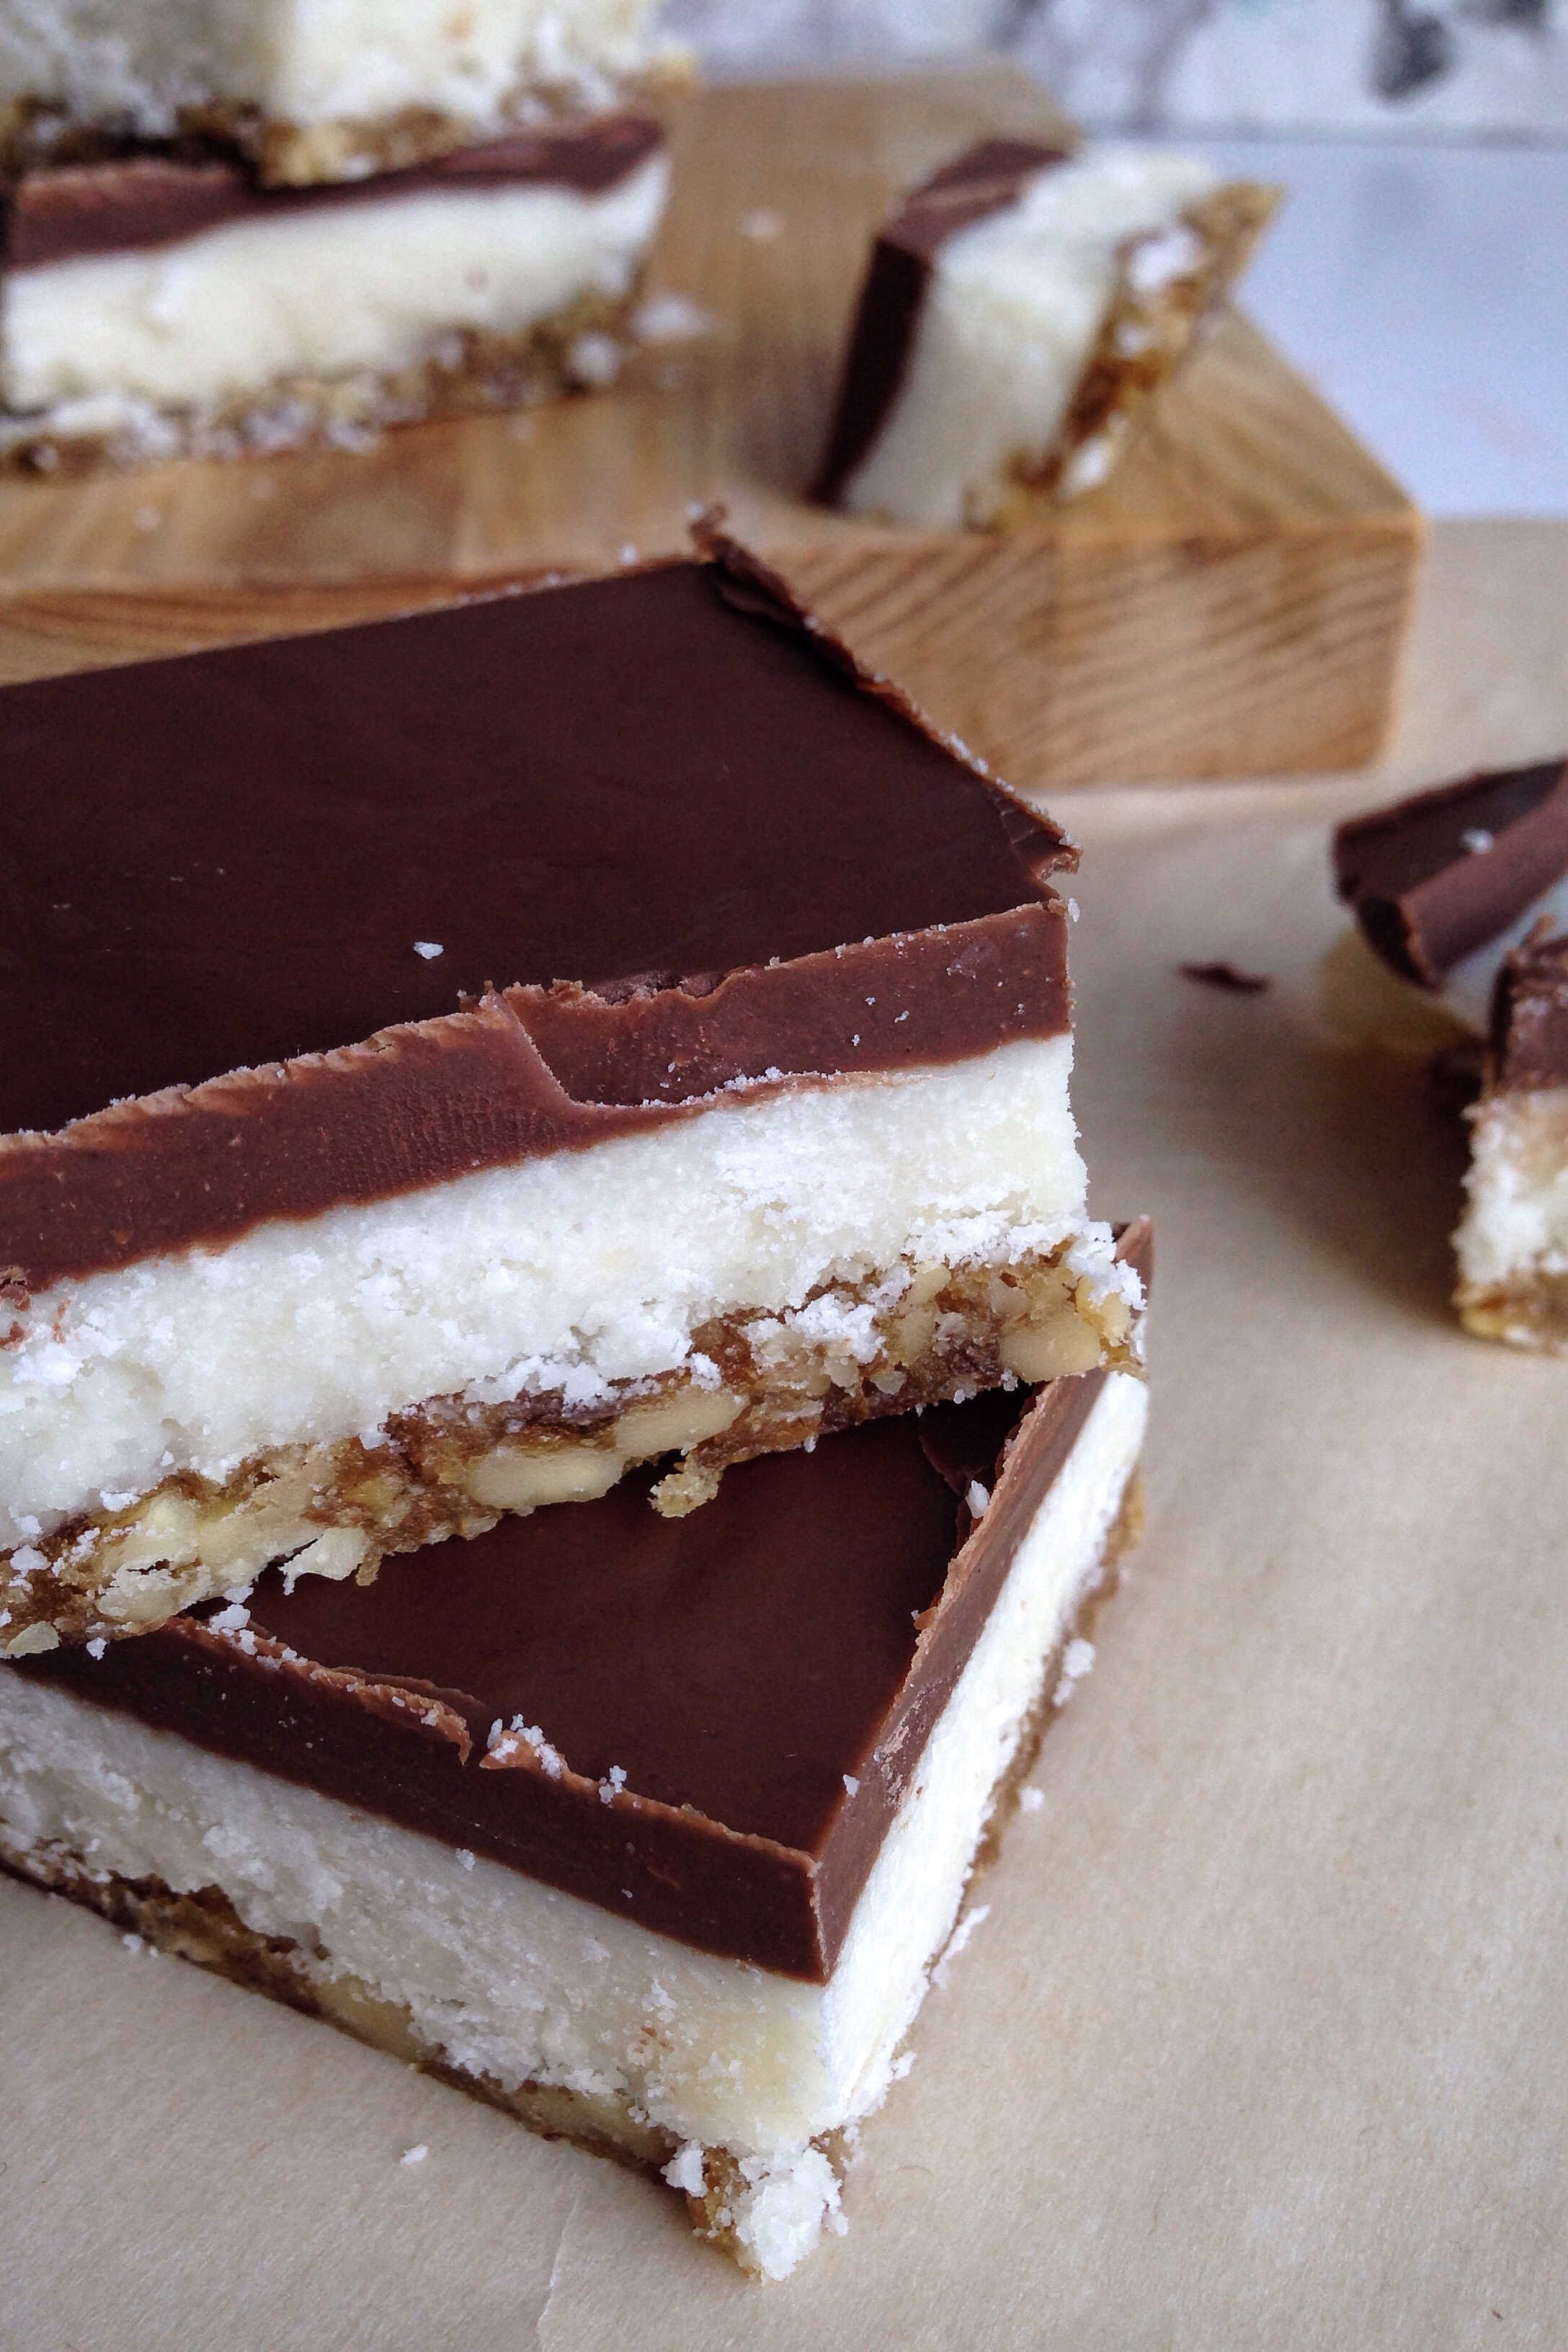
These are a tad different than the normal ones; I made a nut & date base – like the crust of a raw style cheesecake, or a Lara Bar – then a dense coconut filling, and topped it with a silky layer of chocolate.
Very simple.
You’ll need to have an 8inch square pan; I used a glass one and lined the bottom with parchment paper. As with most desserts of this “bar” style, you can make it in cupcake tins as well although it will be more work to mold each one individually.
ingredients
for the crust:
- 2 c raw walnuts
- 1 c medjool dates, pitted and rough chopped or snipped into pieces with a scissors (soaked in warm water for 15 minutes if not very soft)
- pinch of salt
for the filling
- 2 1/2 c desiccated coconut (unsweetened)
- 1/2 c coconut oil
- 3/4 c coconut butter (yes, coconut butter and coconut oil are two different things. The butter doesn’t soften at room temp the way the oil does. If you need to replace the coco butter with something else I would recommend using soaked cashews. Keep in mind that the texture will be different!)
for the chocolate topping
- 1 1/2 c chopped semisweet chocolate
- 1/4 c coconut oil
- 2 T vanilla paste OR 1 t vanilla extract
- 2 t cocoa powder OR cacao powder
Process all crust ingredients in a food processor or blender until uniform in texture and you don’t see large pieces of walnut anymore. Pick up a bit in your hand and squeeze it together – if it holds together in a ball, you’re ready for the next step.
Press the mixture down in your parchment lined pan, firmly and evenly all the way to the edges.
Place the crust in the freezer until your filling is ready.
Process all filling ingredients in a high powered blender or food processor.
Blend until very soft and smooth. You may add a tablespoon of water IF you really need to get it blending but I wouldn’t recommend more than that. You want this to be very thick so that it doesn’t slide apart when you cut the finished product.
Scoop the mix out and press it evenly over your chilled crust.
Return to the freezer while you make the chocolate topping.
Over the lowest heat possible or using a double boiler, melt your ingredients together, stirring constantly.
Once very smooth, pour over your chilled coconut layer and gently tilt the pan around to get it to spread out to the corners evenly.
Place in the fridge for at least 2 hours until hardened.
You may wish to leave the bars out for ~30 minutes before slicing to let the chocolate and coconut soften if you’re in a cold climate at the moment. In warmer temperatures, it will melt – quickly! Don’t leave it out too long.

^ see how the chocolate cracked more on the right? That was my fault for slicing it right out of the fridge. Leaving it out for ~30 minutes helped to avoid that problem. The coconut butter is rather hard at room temp so use a sharp knife. 🙂
Slice as many pieces at a time as you wish. I like to slice only a few at a time and keep the rest hidden so I’m not tempted to munch on it all day.
Will keep well for 7-10 days in the fridge in an airtight container. Will last longer in the freezer but I’ve never stored it in there. Let me know your results if you do!
Enjoy!

One Response to “Mounds Bars /or Bounty Bars, depending on where you’re from…”
These look devine. YUM!