
Onigiri! [aka – rice balls]
Not to be confused with onigirazu – onigiri is a rice ball that you shape with your hand. Remember I went through the makeshift definition of onigirazu – “rice ball that you don’t shape with your hand”? Well, this is exactly the opposite. One you do shape with your hand (ok, or a mold let’s be honest).

Yes, I LOVE traditional Japanese food; I love the history of it, I love making 25 rice balls and eating 25 rice balls; I love having a cabinet dedicated to sushi vinegar and sesame seeds and noodles; I love the smell of the kitchen after frying those rice balls in sesame oil…
Off topic – I get tons of questions about why I eat so much WHITE rice, and isn’t white rice too carby and aren’t carbs bad?! on instagram all the time. I will address that in a post on here soon!
You can pick up a neat little onigiri mold (yes, I did) for less than $10 on amazon or from an Asian market. It makes the process easier, faster and adds another cool gadget to your kitchen repertoire. I’ll warn you though, once you start looking at that stuff, you’ll find SO MANY CUTE THINGS. Omg. Panda shaped molds, hello kitty soy sauce dripper thingys and whatnot. I couldn’t contain myself.
Onigiri is a great dish to bring to a potluck party. Once you get in the rhythm, you can make a few dozen of these easily. Portable, filling and you can make a bunch of different fillings and flavors. Who doesn’t love rice? My kids never complain when I bring a bunch of these to the beach or the park.
Of course you can shape the rice by hand too! It’s not difficult, but like the onigirazu, it takes practice.

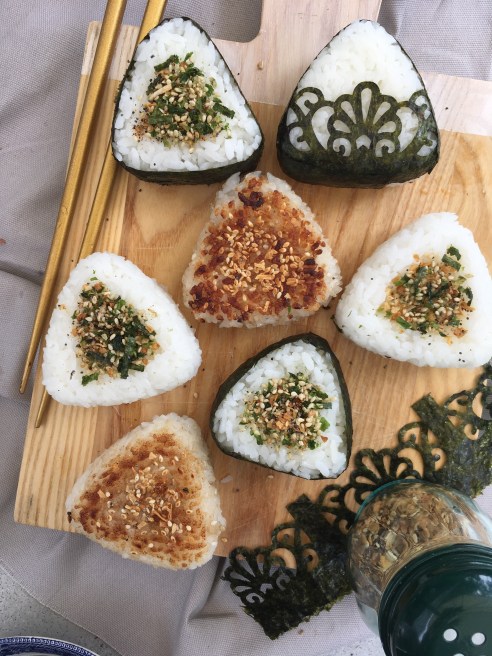
The three types of onigiri I’ll be doing today are:
- avocado stuffed
- furikake
- pan toasted
The ideas you could come up with these are endless. You could stuff them with just about anything! I’ve seen them stuffed with cucumber salad, slices of spam & eggs, umeboshi (Japanese pickled plum), tuna, seaweed salad, kimchi, etc…it’s an easy thing to get creative with – not only with the fillings and the rice, but with the wrapping also!
*When you’re using so few ingredients, i.e. just rice and nori, making sure they’re good quality is important. Use a high quality raw nori (best for folding and manipulating) and a good quality sushi rice as well.

My favorite!
First, and most importantly, start with your sushi rice. If you don’t have sushi rice, pick some up from the grocery store. Most carry it nowadays. Just make sure it says “sushi rice”, medium or short grain, and not just white rice. Whole Foods has it is in their bulk section, as will any food co-op. I buy mine online from amazon in 15+ pound bags, unless I’m out of it and I run to Whole Foods and fill up a sack from the bulk dept. HOWEVER – I will strongly advise AGAINST buying “Rice Select” brand from Amazon: they sent me the wrong rice twice, didn’t allow me to return it, and never sent me the right kind. 😵
Follow the directions on the package (some rices differ a bit if they’re short grain or medium grain), and let it cool before starting to work with it. Never use a metal bowl or metal utensils after cooking the rice.
Transfer the rice, once it has cooled to a glass or other non-reactive bowl and mix in 2 T rice vinegar per 1 cup uncooked rice. I use a bamboo, wooden or plastic paddle/spoon to mix (again, don’t use metal).
Prep what you’d like to stuff inside the onigiri, if anything.
I’m using avocado and shredded cucumber to stuff these first ones.
Have a bowl of room temp water at your work table.
I’ll talk about using nori (seasnax raw!) to wrap the onigiri towards the end of the post.
Wet both hands thoroughly.
Scoop out a handful of rice and flatten it into your palm.
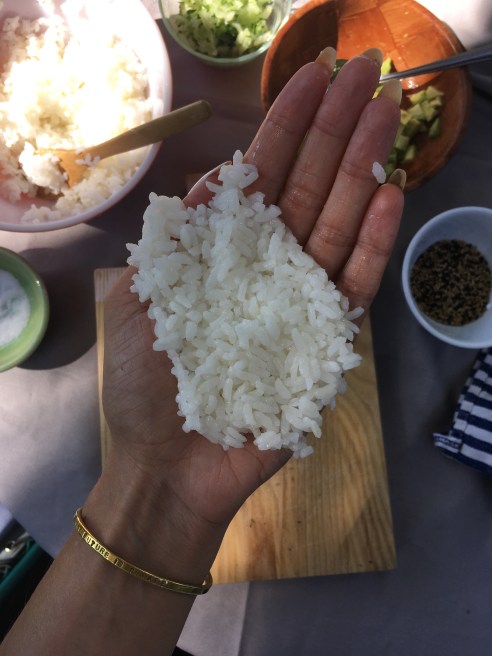

With wet fingers, press down in the center of the rice to make a small dent. Add one or two tablespoons of whatever filling you’re using but not too much (so do it a little neater than I did, lol) otherwise it will be hard to keep it closed.
Wet your other hand again and scoop out some more rice to cover the top of the filling.
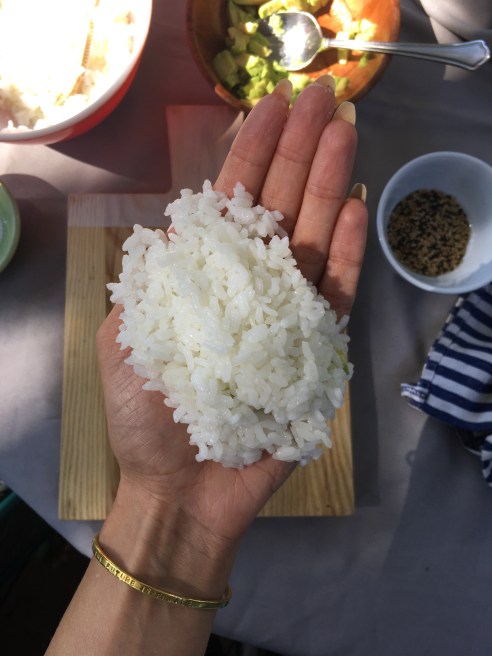
Using both hands, press firmly to create a triangle shape. Make sure you’re putting pressure on the rice so that it sticks together. This takes time, and practice.
Pro-tip! Don’t overwork your rice when shaping it in your hands. A fluffier onigiri tastes/bites much better than one that is overly compacted.
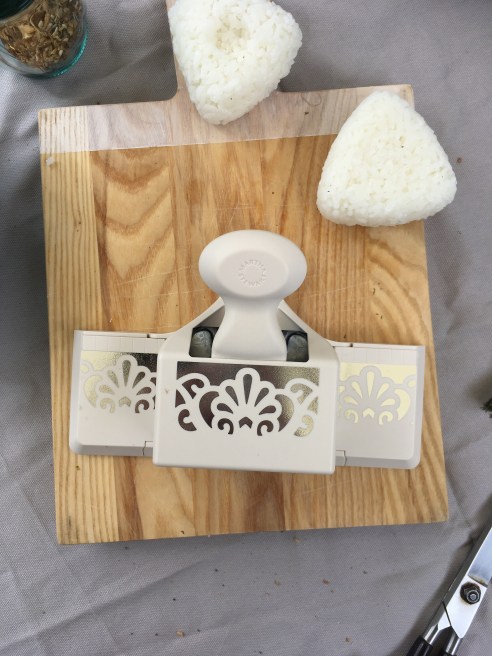
If you’re using a mold to make your onigiri here’s what it’ll look like:


It’s really rare that I recommend to buy a piece of plastic…but I love this thing, and you know me. I eat rice EVERY day. This thing cuts my prep time in half and gives me more time to eat and enjoy it. Click on each photo for more detail, but it’s pretty simple.
First wet the inside of the mold with your fingers, just for an extra layer of security.
Fill the bigger half with rice, but don’t pack it too full. You can see that the bigger half has triangular shapes on the inside that you can press inward.
The other half has two removable buttons. They leave a small indent that I’ve seen used for putting filling inside the onigiri. If it bothers you, you can leave the buttons off, but the indent doesn’t bother me and it makes the onigiri pop off the mold very easily.
The buttons came on the outer side of the mold when I received it in the mail, so I popped them off and stuck them on the other side.
You can see that I’m pushing the side with the two buttons down onto the rice. Push down firmly.
Flip the whole contraption over and as you gently push down on those wiggly triangle shapes with two fingers, pull the whole top piece up with your other hand. The rice should slowly slide down and you should be left with the last picture: the two onigiri sitting on top of the bottom piece.
This is where those two little buttons come into play: carefully flip over your onigiri, still stuck to the mold (unless with a wet hand you can pick them up, but if not then just keep on going) and pop those buttons through.
Now you can make onigiri faster than you can eat it! 😉


*Furikake is a traditional Japanese seasoning, that is sprinkled over cooked rice, fish, veggies and other dishes, made from dried fish, sesame seeds, seaweed, sugar and salt. If you’d like to read the history of furikake, click here. I love reading up on the history of what I’m eating.
Here’s how to make a plant based version of furikake if you don’t have access to the traditional version or have an allergy to something in there, or just want to make your own – and yes, there are versions you can buy online or in the store that are plant based. I mixed it with some nooch (nutritional yeast) for an extra salty kick and it was great.
To make it yourself, you will need:
- 1 t coarse salt
- 1 t sugar
- 1 t nutritional yeast
- 1 sheet toasted nori, ripped into thin strips (preferably unseasoned)
- 1 t sesame seeds
- 1 t black sesame seeds
- 1 t dried onion or garlic flake, I love a little of both (optional)
Pulse in the blender or food processor until mixed and coarsely ground.
Pour into a shaker and add 1 teaspoon each of white and black sesames (whole ones), to add more texture.
Shake to mix.
To make your furikake onigiri, portion how much rice you’re going to use into a bowl and sprinkle your furikake to your liking (either homemade or store bought) into it. Mix well with your rice paddle. Taste and see if it’s seasoned well enough. Remember that there’s salt in the furikake so don’t over do it! You can always add more.


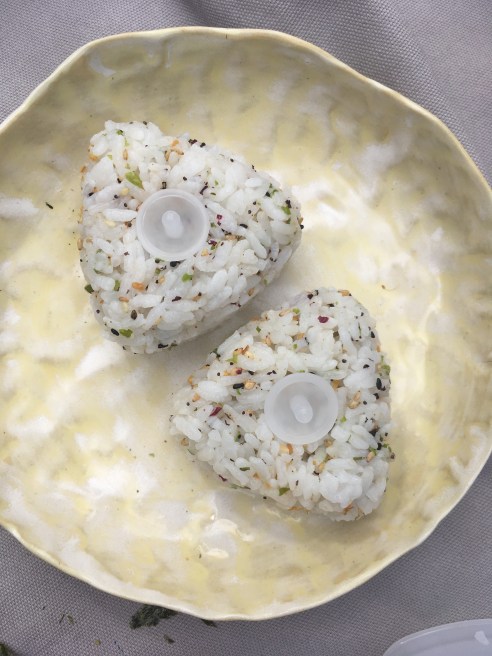
See those two little buttons above? That’s what I was talking about previously. They leave a small indent (easily covered up by nori) but they do make it easy to pop off the onigiri from the mold.
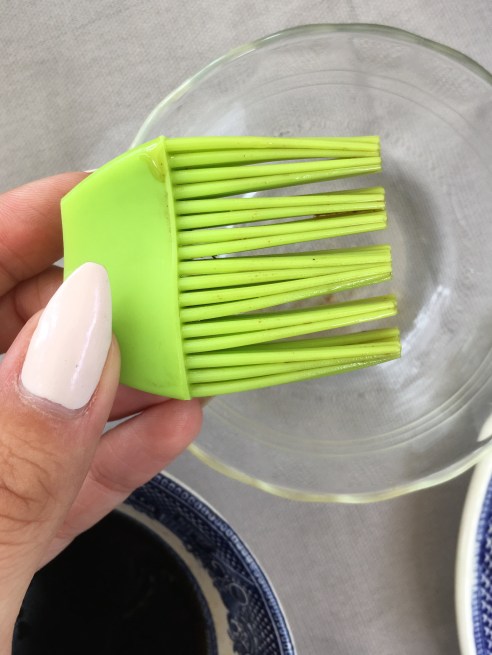
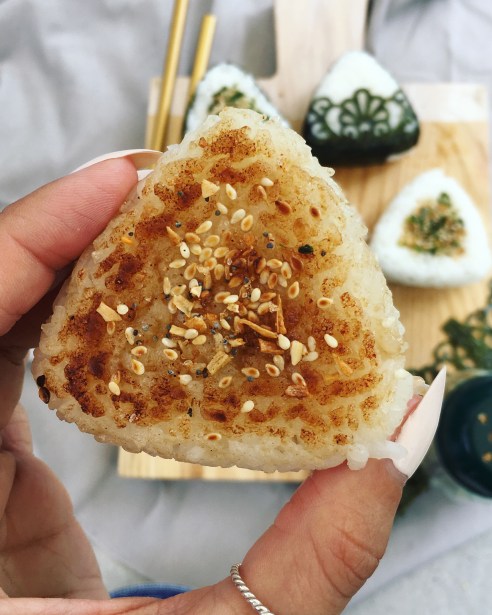
For the pan toasted version, called yaki onigiri, have a silicone brush or any brush that you use for brushing oil onto food handy, and a small bowl with a few teaspoons of sesame oil ready. In a separate bowl have a few teaspoons of tamari or soy sauce (or if you don’t feel like dirtying two bowls, just use the same bowl 🙂 ) If you don’t have an oil brush you can just dip the onigiri in shallow plate.
Heat a pan over medium heat and either spray it with cooking oil or wipe it with a lightly oiled paper towel to grease it.
While the pan is heating up, shape your plain sushi rice into onigiri and brush it with sesame oil on one side.

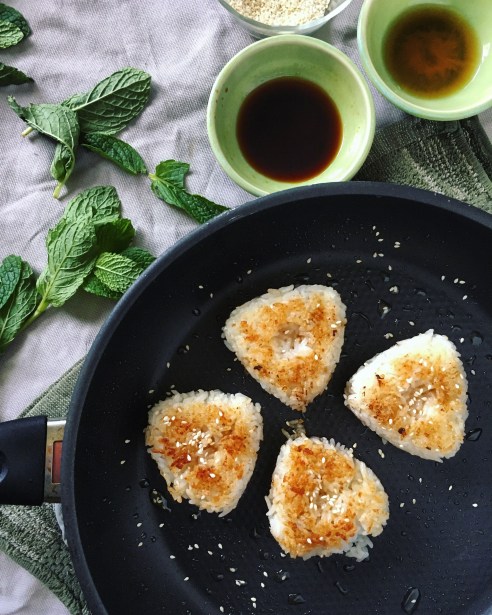
Place the onigiri, sesame oil side down into the heated pan.
Brush the other side with sesame oil while the one side is down cooking.
Let each side get crispy and toasted for about 3-4 minutes.
When each side is golden brown, brush lightly with tamari or soy sauce and sprinkle with sesame seeds.
Toast each side for an additional minute.
Remove from the pan and either serve while still warm or see below for ideas on how to wrap with nori.
(These are addictive – just warning you)
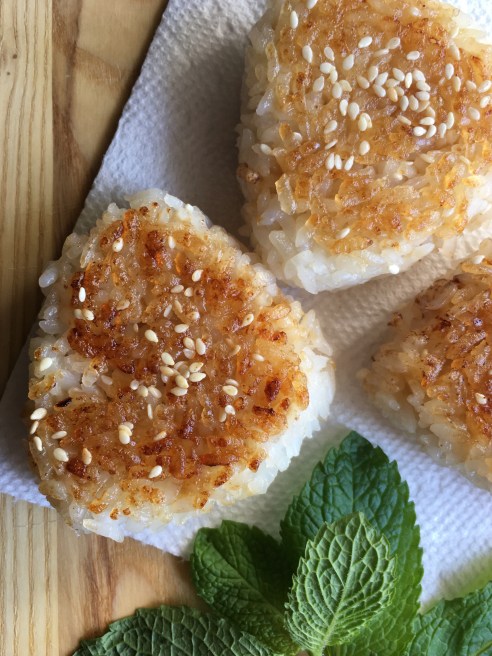
I’ve been eating these wrapped in nori, dipped in spicy mayo, with a few fresh mint leaves tucked in also. SO good. I love fresh mint.
Of course my kids love rice, but rice wrapped in nori is like christmas and a birthday combined.
My personal preference for wrapping is —-> SeaSnax’s Raw nori.
So, lets look at a few ways you can wrap your onigiri in nori.
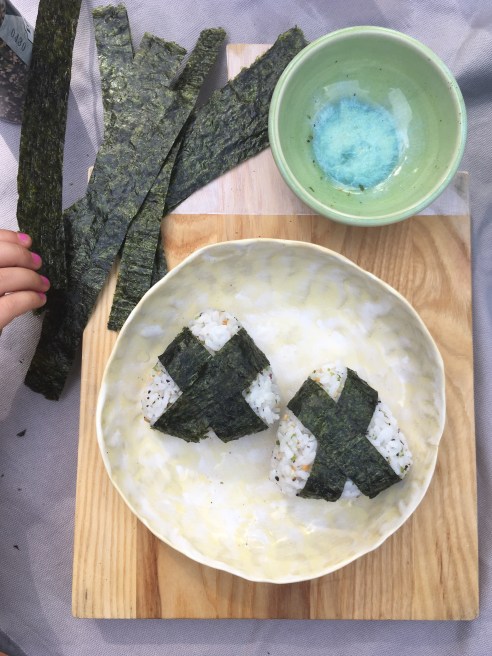
This criss cross wrap is pretty and simple.

Cut 1 inch strips on the longer side of the nori.
Lay an X down on your work surface.

With wet hands, pick up a rice ball and place it in the center of the X.
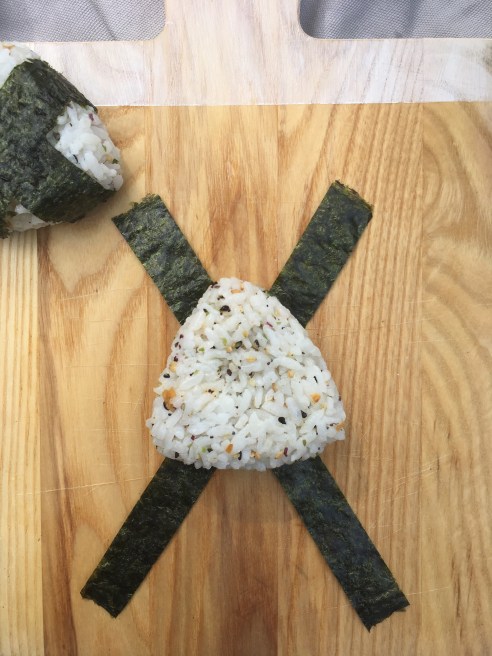
Fold up all the strips to meet in the middle, and with wet finger tips, press all the nori gently against the rice to make it stick.


You can wrap the entire onigiri up. This is my personal favorite, and my kid’s favorite way also. It’s basically like eating one, giant piece of sushi. I’m sure my kids secretly think it’s hilarious. If you’ve stuffed the onigiri with something, it’s a safe bet to wrap it like this.
Apply your onigirazu skills here and wrap it up neatly, dipping your fingers in the water when necessary. I like to leave the top open.


If you’ve tried the yaki onigiri (pan fried), doing a simple wrap, one strip, or a criss cross, is a great idea. Your fingers won’t get too greasy and it will hold together a bit better.
Wanna get super fancy? Try a paper cutter or use a scissors and make your own designs.


Now you’ve got the basics of making onigiri!
Get creative, add in your own fillings, make your own sauces, and always remember to share your rice balls. 😉

One Response to “Onigiri! [aka – rice balls]”
[…] ways I make onigiri and all the details on how to make onigiri (rice balls) by clicking here and jumping back a few […]