
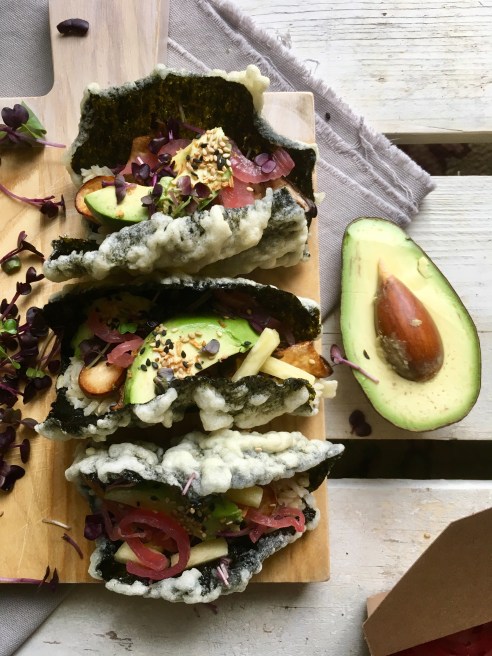
Sushi Tacos // ++Tempura Frying Nori

Some meals you can eat over and over again and not think twice about it. To break up the monotony, you need recipes like *this*.
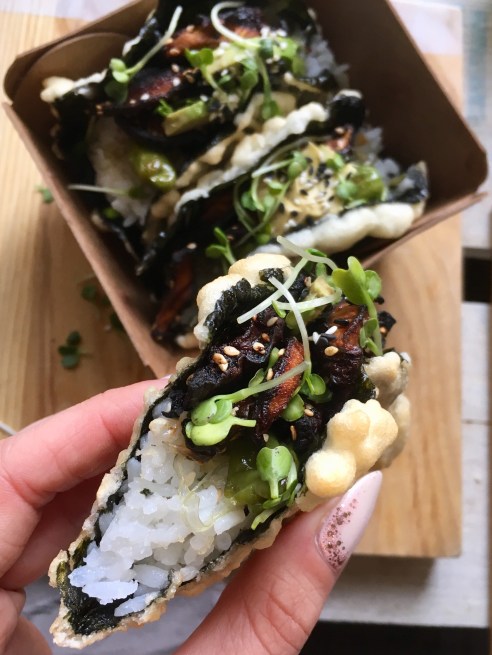
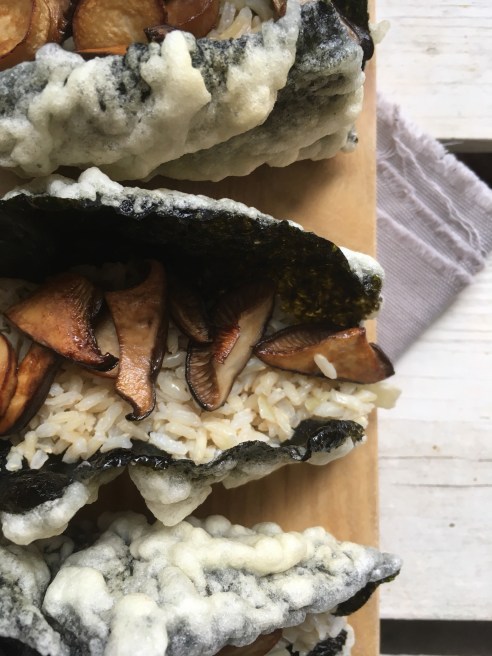
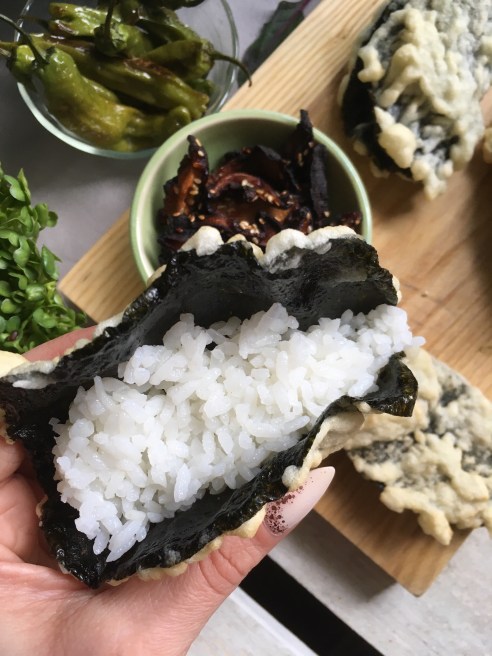
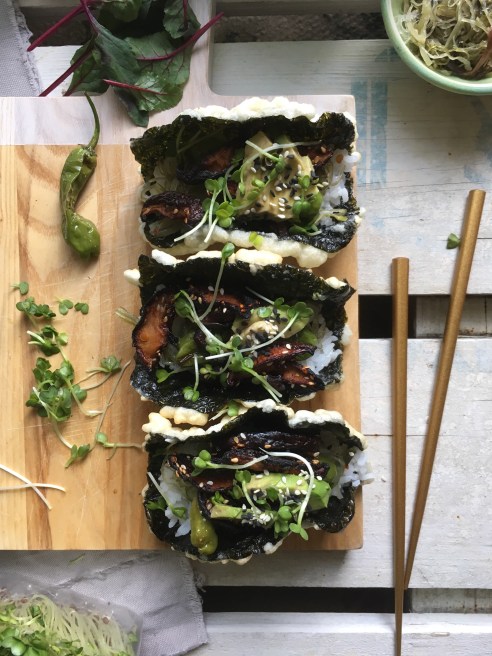
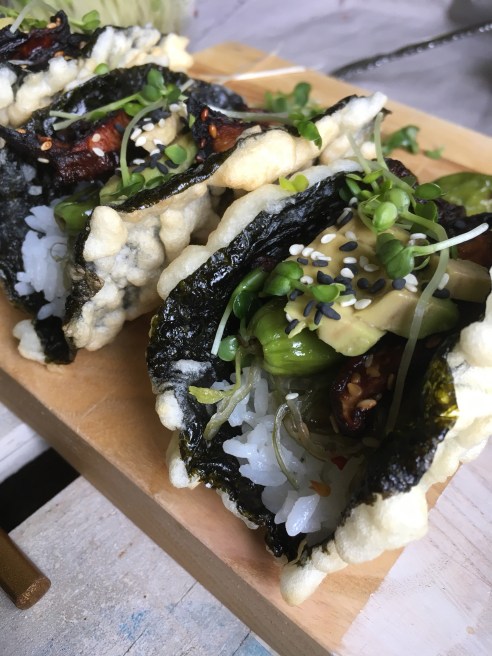
Who knew tempura battering nori and frying it would make for an amazing taco shell?!
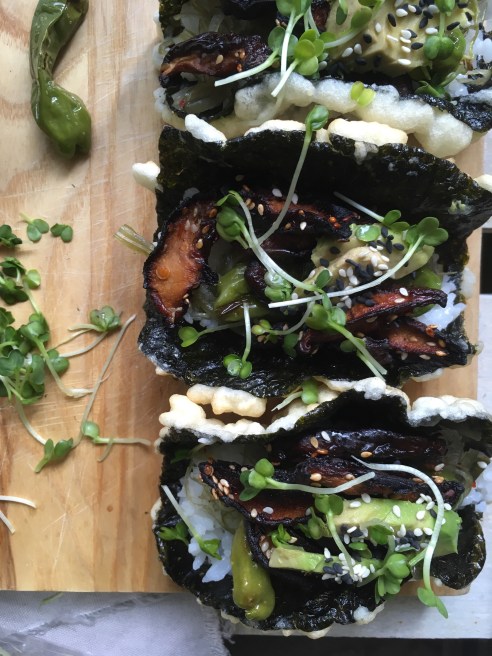
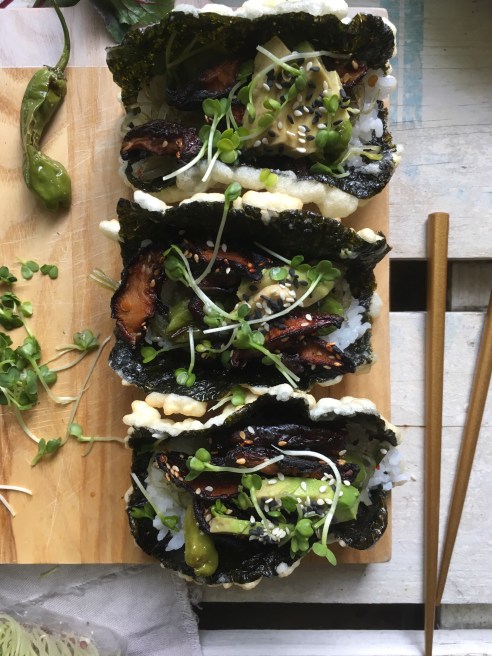
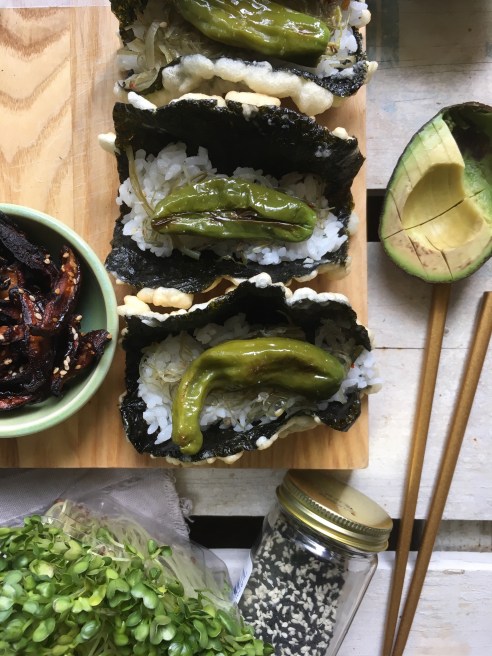
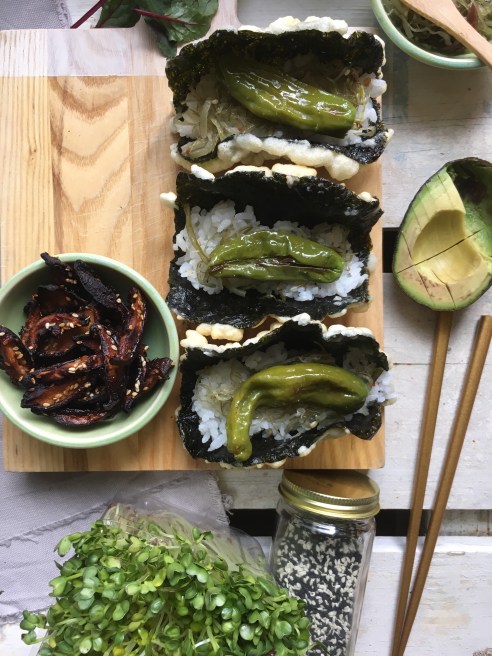
Throw in some sushi rice, avocado, veggies, mushrooms, tempeh (or whatever other protein of your choice) and top it with some saucy sauce – I usually go for sriracha mayo or teriyaki – and you’ve got a super crunchy, delectable sushi taco.


If the only thing you take away from this post is how to properly tempura batter and fry nori, then so be it – because it’s INCREDIBLE.


YES we’re frying this, YES it’s (slightly) messy but OMG it’s good asf.
Decide what you want to fill your tacos with and chop/prep as necessary (except for the avocado; I always do that right at the last minute).
Use rice as your base and get creative with toppings. I almost always use sushi rice 🙂
Some ideas for fillings:
- pan fried tempeh bacon, finely chopped
- daikon thinly sliced
- kimchi
- scallions
- jalapenos
- anything pickled
- roasted cubed tofu
- kani salad
- edemame
- sprouts – pea, radish, beet, spinach, microgreens, etc. – anything bitter will be nice to offset the richness of the tempura
- avocado
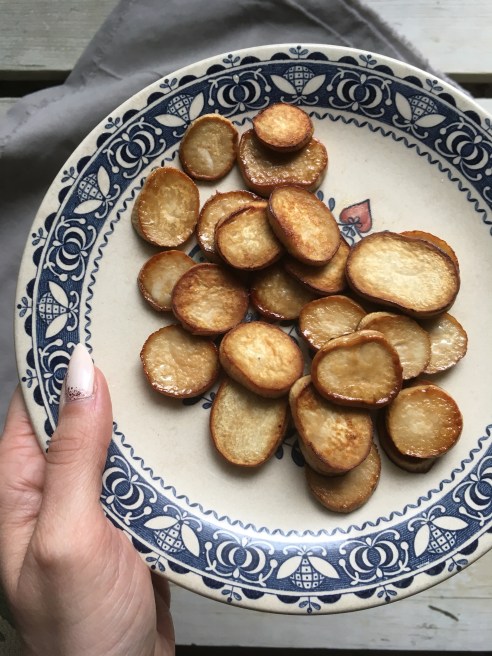
- fresh finely chopped or grated veggies – carrots, bell peppers, cucumbers, radishes, etc.
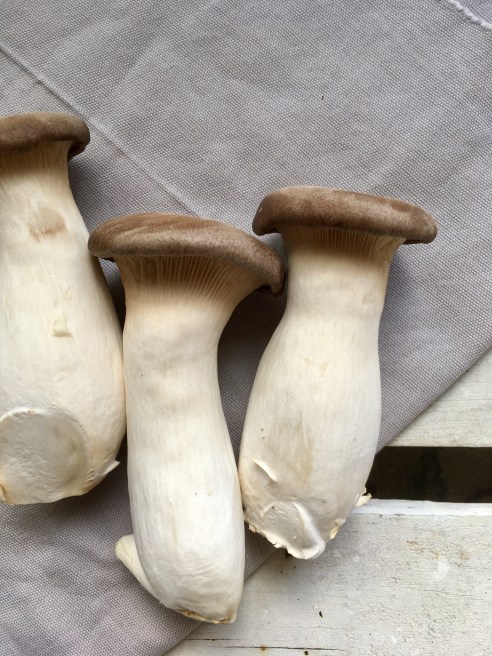
- mushrooms, either pan fried or roasted until cripsy so they’re not mushy and wet (I’ll be doing an example of a great way to add mushrooms to this below!)

Heat up a heavy bottomed pot about 1 1/2 to 2 inches high with a light, flavorless oil, good for frying over medium heat. I usually use extra light olive oil or sunflower oil, if on the rare occasion I’m going to deep fry something, since they have the highest smoke point.
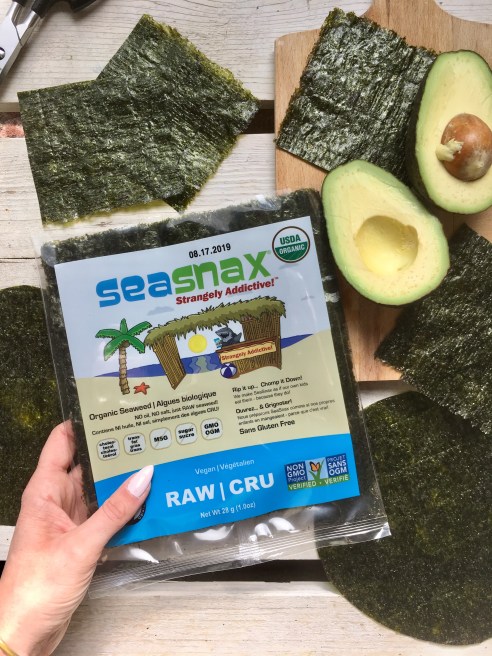
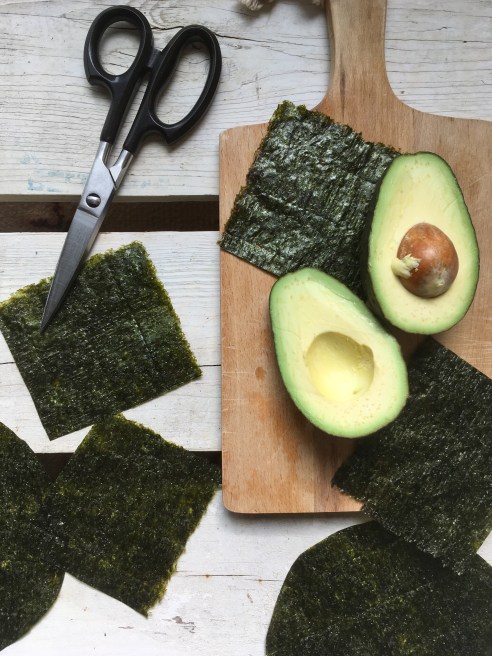
While the oil is getting up to temperature, prep your nori. If you want to make hand held size tacos, you can cut circles out of the regularly rectangle shaped nori sheets. You know by now that SeaSnax is my go-to for nori.
The raw nori SeaSnax is what you’ll need for frying 🙂

Note: don’t make the batter ahead of time. As the batter rests, it doesn’t get better. You should make it and use it right away.
Some people use an egg or egg whites in their batter. There’s nothing wrong with using an egg, and it doesn’t change the consistency much. It does change the color of the batter a bit and you taste more of the batter rather than the veg or whatever else you are frying.
Tempura batter:
- 1 1/4 c AP or GF flour, sifted (don’t skip the sifting! It makes the batter light)
- 1 T cornstarch, sifted
- 1/8 t baking powder
- 1/4 t salt
- 1 c veryyyy cold water + extra (do this by pouring a cup of water into a glass with a few ice cubes, stir it around and then strain out the ice and pour exactly 2/3 cup back into your measuring cup)
Sift the flour first into a mixing bowl, then sift the cornstarch and baking powder in and whisk together to mix. Add the salt and mix as well.
Using a spatula to stir, slowly add the water and mix together gently. Don’t over mix, don’t use a whisk for this part and don’t worry about lumps. When using the GF flour, I always need to add more water than 2/3 cup. I probably doubled it but don’t worry about being exact. Just as long as you can get to a goopy, spreadable consistency: not too thick but not too thin.

You could also make tiny, tapas sized tacos and get two or even three tacos out of one sheet of nori!
Just be forewarned that it is slightly difficult, the bigger the nori is, to keep it flat once you drop it into the oil.
Once your nori is cut to shape, your batter is mixed, and you think your oil is up to temp, you can test the oil by dropping a small drop of batter into the oil. If it immediately floats back up to the surface and sizzles, then the oil is ready for frying. If not, then wait a bit longer and test again. The opinion seems to differ on this, but the oil should be somewhere around 350 degrees F if you do have a thermometer and want to use it.
On a separate dish or a clean, dry cutting board, lay down one of the cut sheets of nori. Spoon a few tablespoons of batter onto the nori and using the back of a spoon or one hand, smear the batter all over the nori, taking care to cover the whole sheet and not to rip it (once wet it gets very soft).

my go-to shape for tacos
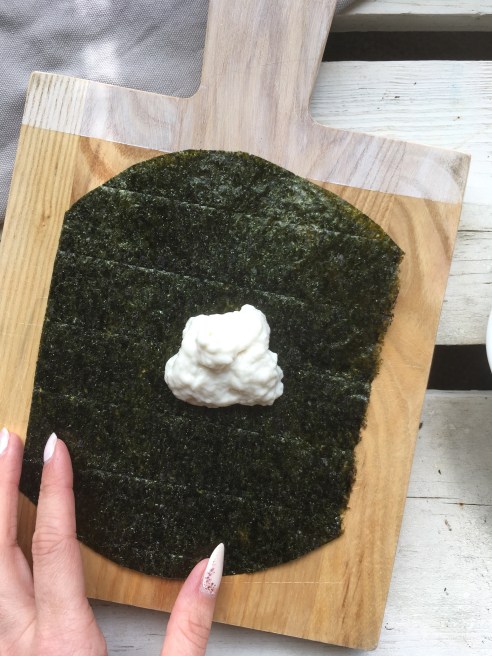
not too much!

Smear away
PRO TIP – only cover one side of the nori in batter, not both! This allows for much less frying time, and much less greasy mess.
Let any excess batter drip off and carefully (remember the oil is hot!) lower the nori into the oil.
Like I mentioned above, you can hold the nori for the first 2-3 seconds in the oil with heat safe chopsticks or any other utensils. After it starts to fry, you won’t be able to manipulate the shape that much, so do it when you first drop it in.
I can fit 2-3 mini nori tacos in my oil pot at a time, but don’t over crowd your taco shells if you don’t have the room. Crowding anything while frying in oil doesn’t allow your food to crisp up evenly.
While the nori is frying, make sure you have a plate lined with a clean kitchen towel or paper towels ready to absorb some of the oil when you are ready to take them out.
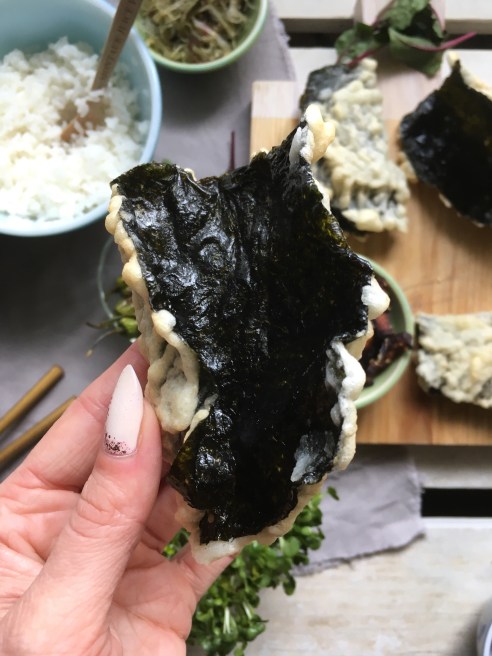
If you coated both sides of the nori with batter, then give it a flip after a minute, until the first side looks crisped and just barely golden. Otherwise just let it fry on the battered side and take it out when done. No need to flip it over if you only coated one side of the nori.
Depending on how hot the oil is, it should take no more than one minute to fry on one side.
When you’re ready to take one out, lift it up and let the excess oil drip back into the pot. Place it on your plate and using your chopsticks or tongs, gently fold it in half to make a taco shape, if you’re using them for taco shells. Whatever shape you want them to end up in, now is the time to manipulate it. Once they “dry” they don’t bend as easily as when they’re still warm and fresh out of the oil.
Stand them upside down so that more oil will drain off onto the paper towels/ dish towel. It helps to lean them next to one another, or to use one of those cool little taco shell holders that I really should grab from the restaurant supply store…
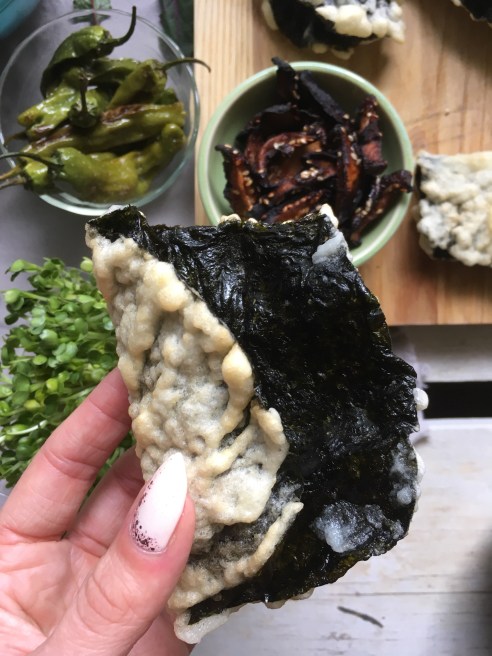
Once all your nori is done frying, you can blot it dry a little more and then you’re ready to load it up with fillings.

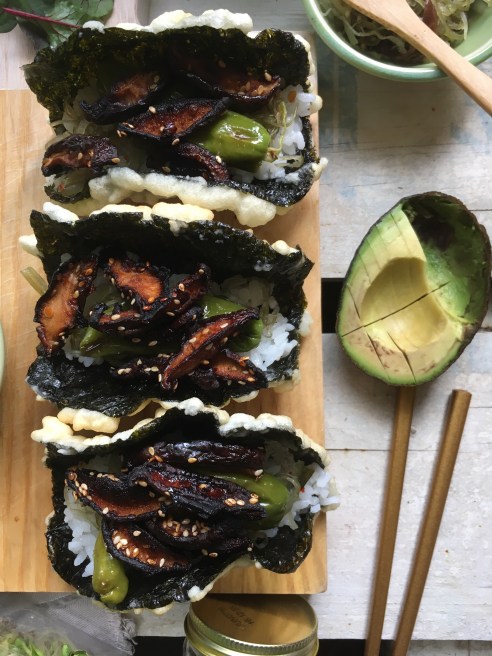
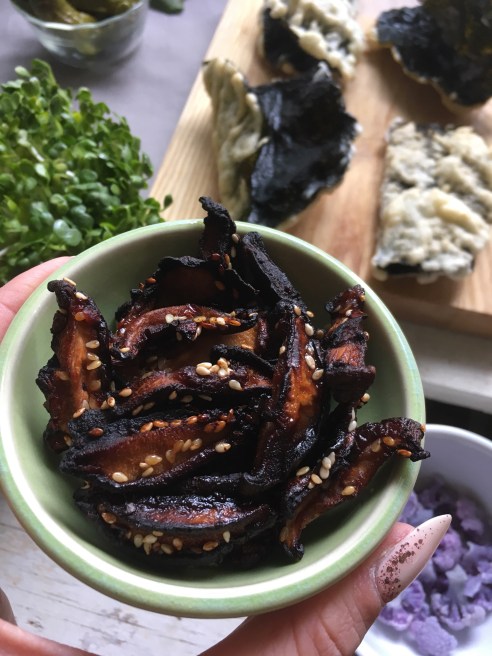
How to make those deliciously crunchy little mushroom bacon pieces…
- 1 3.5oz package of shiitake mushrooms – or anything comparable
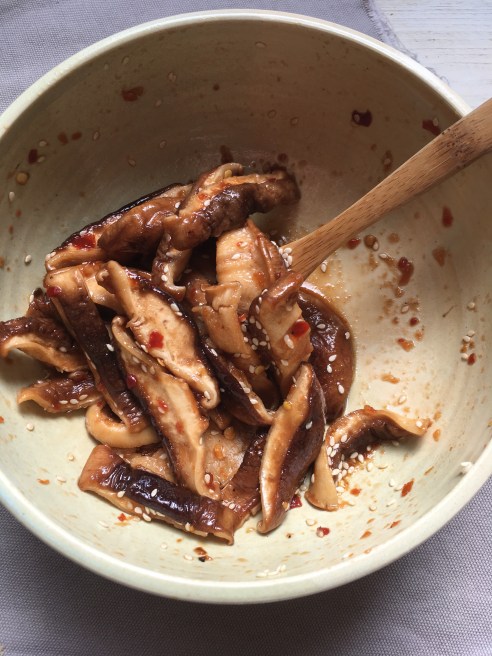
- 2 T mirin
- 2 T tamari or soy sauce
- 1 T light olive oil
- 1 t chili garlic sauce
Preheat oven to 325 degrees F.
Line a tray with parchment paper or a silpat.
Brush any dirt off of your mushrooms and cut off the stems, since they’re usually woody and tough.
Chop the caps into 1 inch pieces.
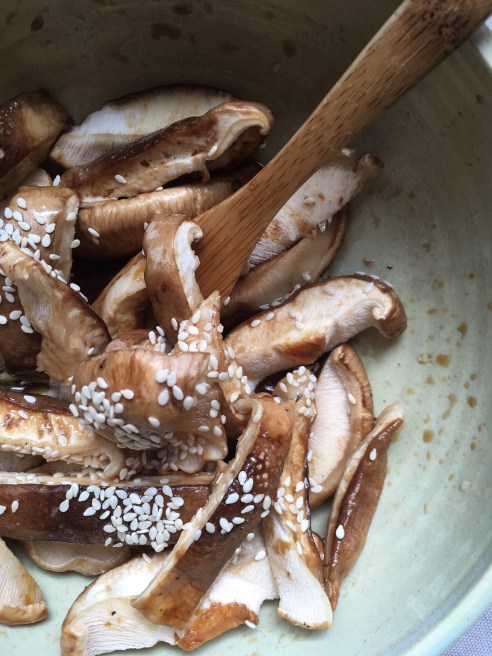
Whisk together the remaining ingredients in a small mixing bowl and add the sliced mushrooms.
Toss to coat and let sit for 5-10 minutes.
Lay the pieces out, without overlapping, and bake at 325 F for 20 minutes. Reduce the heat to 300 degrees and continue baking until crispy – another 10 minutes or so should be fine.
Note – when I bake them in the toaster oven, they get to the “burnt” stage much faster than in the regular kitchen sized gas oven, so keep an eye on them in there. That’s why I recommend turning down the temperature after 20 minutes, so that they don’t burn completely.
My favorite flavor combination so far:
Rice + pickled red onions + pineapple + pan fried king oyster mushrooms + avocado + gomasio + radish sprouts.
Tag me if you try these!

5 Responses to “Sushi Tacos // ++Tempura Frying Nori”
wow!!!!!
😀♥️
You are a genius! I’m definitely trying this. Thank you.
😄💕💕💕💕 let me know how you like it!!
[…] Celine Eats: Sushi Tacos/ Tempura Frying Nori […]